When Facebook announced Messenger Platform with chatbots support at their F8 Developer Conference in 2016, it has opened a new opportunity for businesses to connect with their customers and clients through social media. Chatbot integration is one of major features of the Messenger Platform.
If you are also excited to build a chatbot for your business or organisation then you have come to the right place. There are many platforms available to build bots for Messenger some of them are Manychat, Chatfuel, Dialogflow, Botsify etc. All of them are very good platforms with pros and cons each of their own.
In this blogpost we are going to see Chatfuel. Using chatfuel, you can be a chatbot developer even if you are not familiar with programming. It requires almost no coding for basic chatbots. Chatfuel is a major player in the Messenger bot platforms. It is easy to use and provides a lot of interesting features to build a powerful bot for your business.
How to get started with Chatfuel
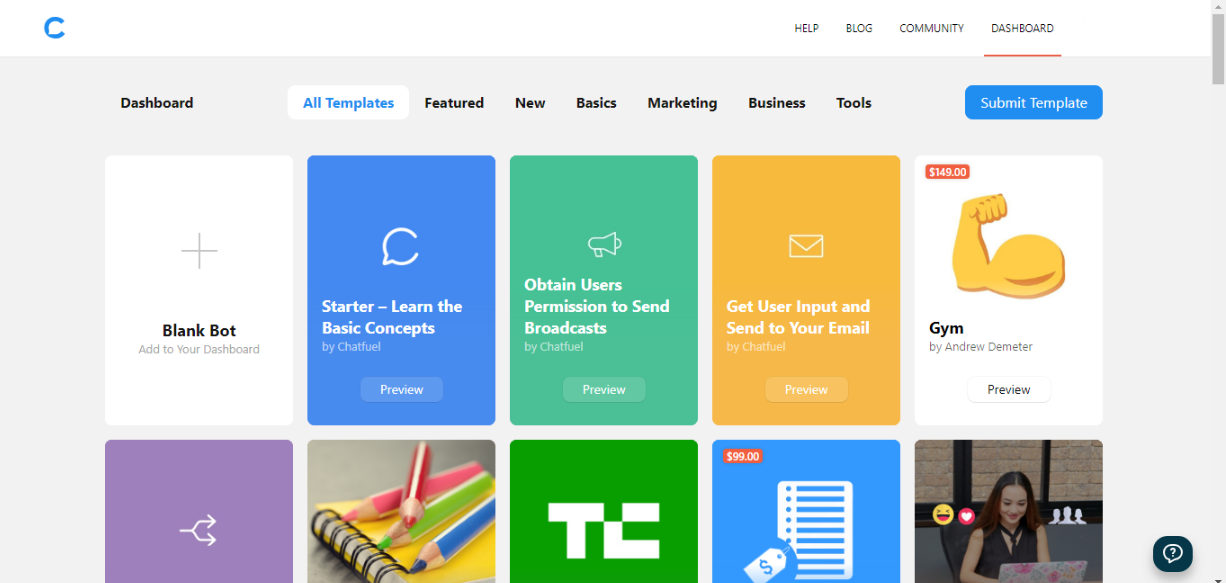
To get started with Chatfuel, you have to sign up with your Facebook account. Then go to your dashboard, select from template or create a blank bot.
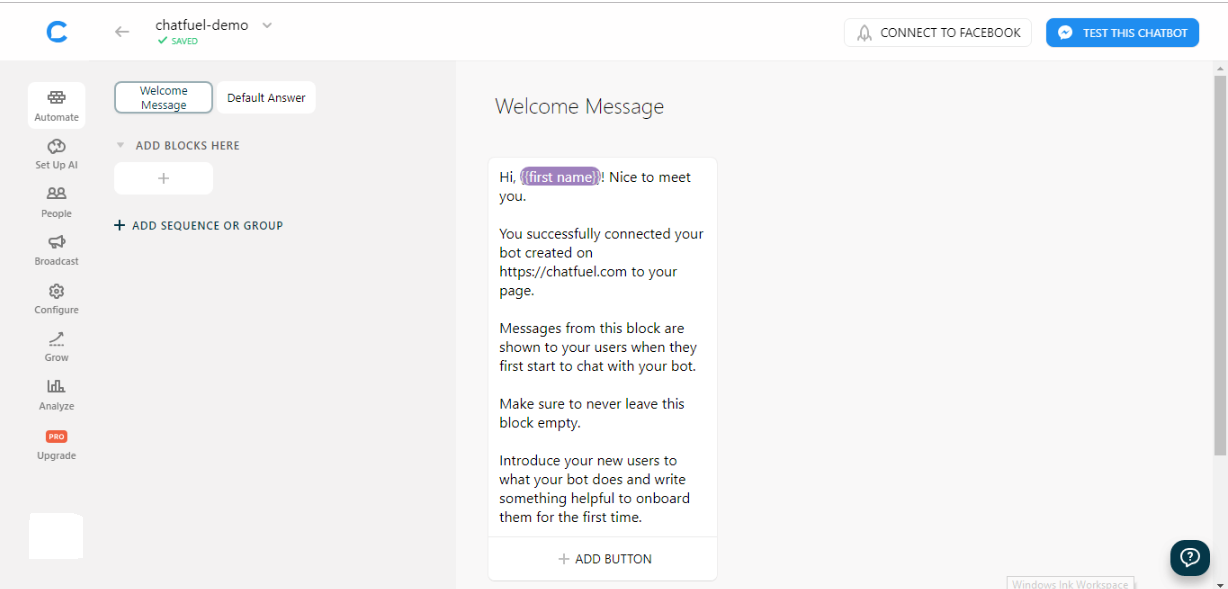
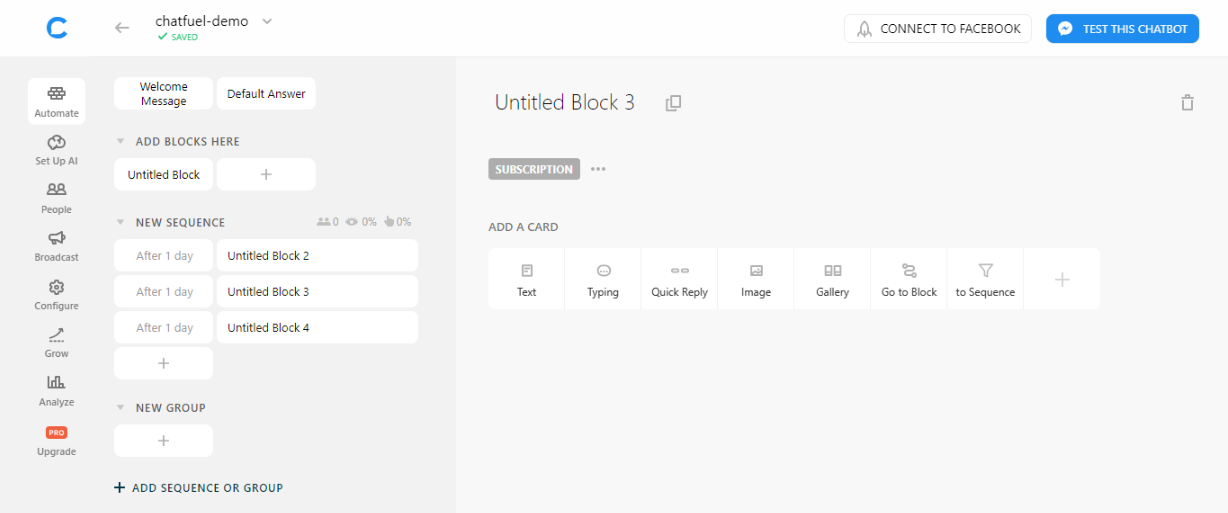
Once you select a blank bot, you will see a dashboard like this.
There are many features available on the dashboard.
1. Automate
2. Set Up AI
3. People
4. Broadcast
5. Configure
6. Grow
7. Analyze
8. Upgrade (if you want)
1. Automate
This is the place where you gonna build the features of your chatbot. Each conversation query response is called a “Block” in chatfuel. If you are building a blank bot, you would see two default blocks (Welcome Message and Default Answer). The Welcome Message block is shown when the user starts the conversation with the bot and the Default Answer is shown when the bot doesn’t know what to do with the user query.
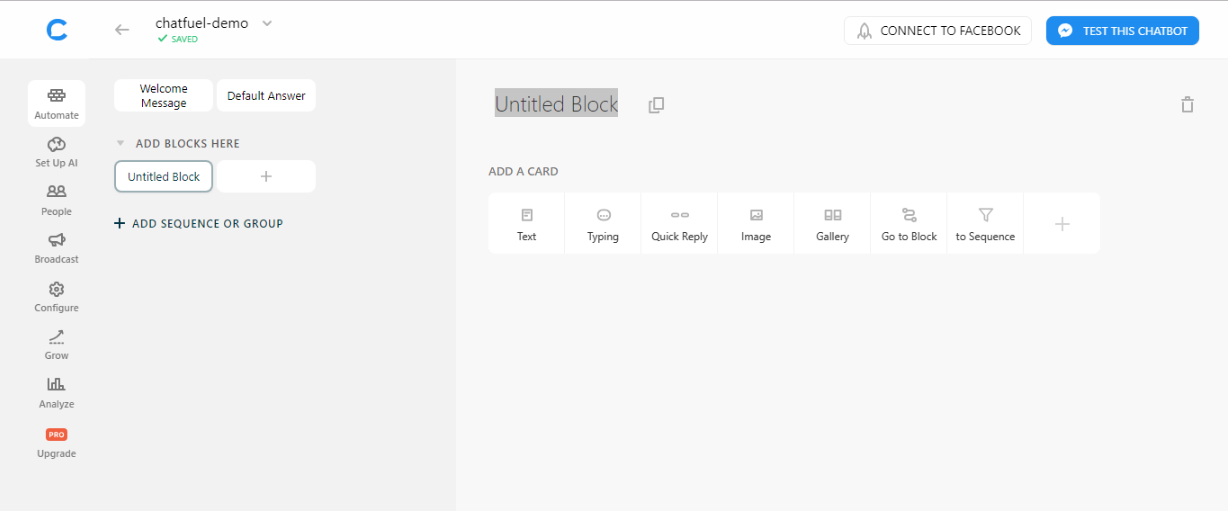
A new block can be created by clicking the “+” button in the “Add Blocks Here” section. By default an “Untitled Block” is created.
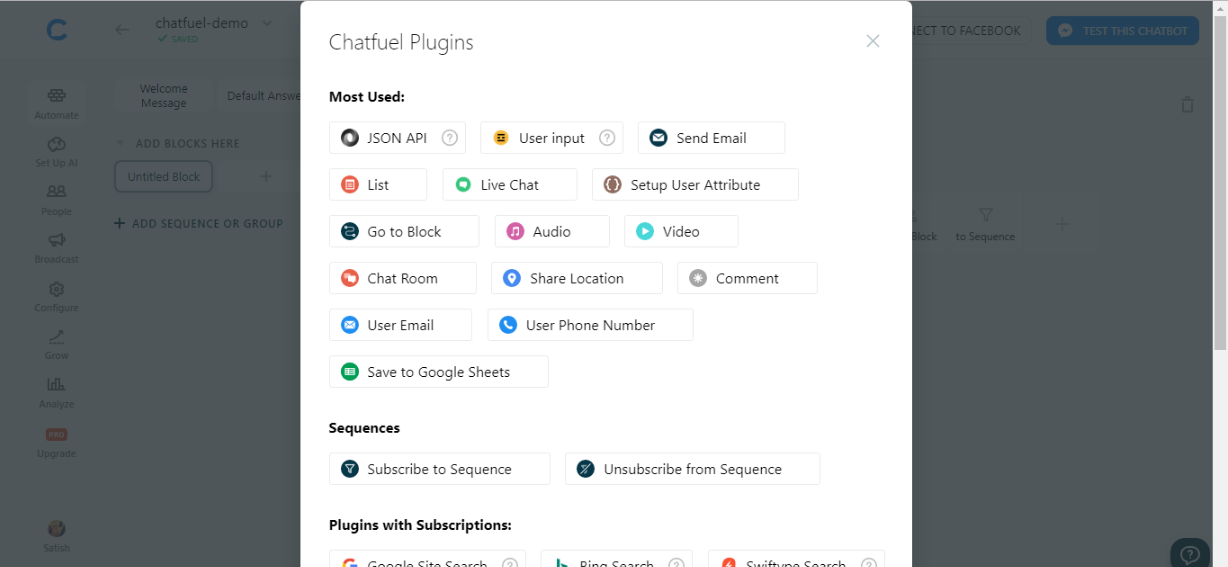
In the block designing section, there is a multi option menu available in the bottom containing several types responses such as Text, Typing, Quick Reply, Image, Gallery, Go to Block, to Sequence and “+” button. On clicking + button you will many more options like JSON requests and many plugins to integrate to your bot.
There are many useful plugins available such as sending email, setting user attributes to remember values, asking for user input etc. We will explore all the responses in other blog.
Another option is there named “Sequences and Groups”. Using group you can create group of blocks for clear understanding of different functionalities of the bot. Sequence are collection of blocks which are executed after some interval such as “After 1 day” or “After 1 hour or second”.
To create a sequence or group, just click the “+” button beside the “Add Sequence or Group” header and select a particular option (Sequence or Group).
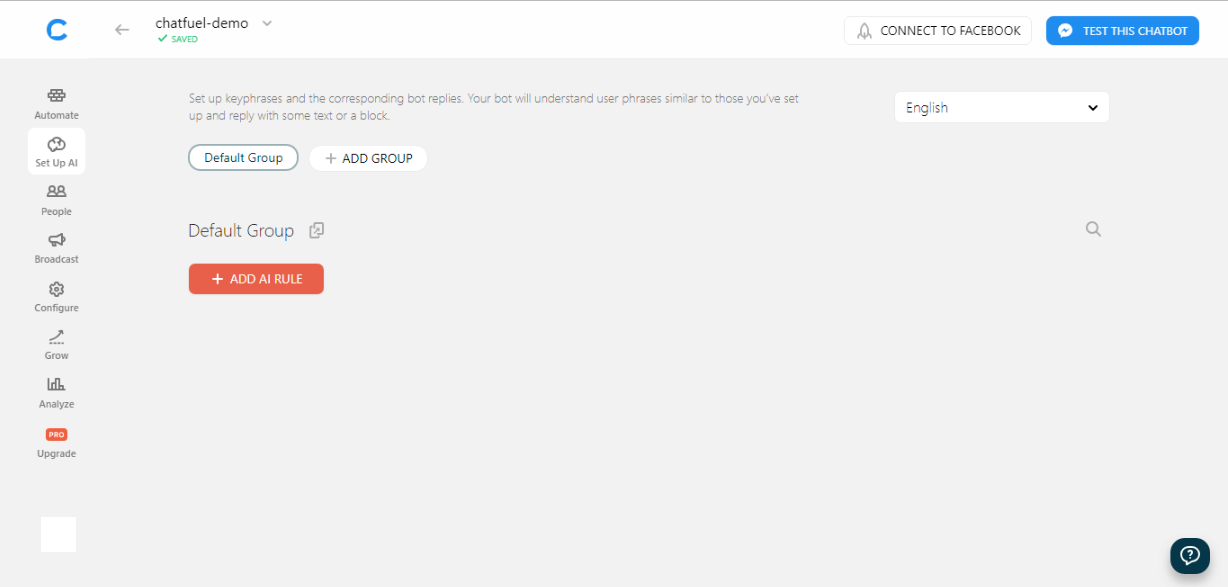
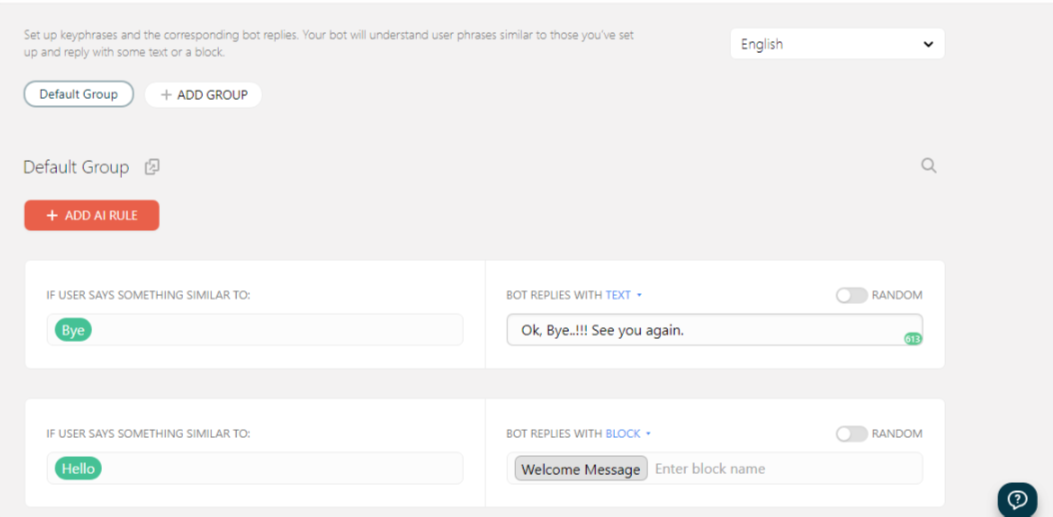
2. Set Up AI
As mentioned in the dashboard, “Set up key phrases and the corresponding bot replies. Your bot will understand user phrases similar to those you’ve set up and reply with some text or a block.” , we can setup possible phrases that can be used by the user and their corresponding response.
To add your keyphrases create a group or use the default group and then click on “Add rule” button. There will be two columns one for the query and the other for response. The query is a string and the response can be a text or a defined block.
3. People
This a PRO feature. People menu has a some of the interesting features like audience insights, the custom audience for Facebook Ads and exporting user details etc. You can learn more about it on the Chatfuel dashboard.
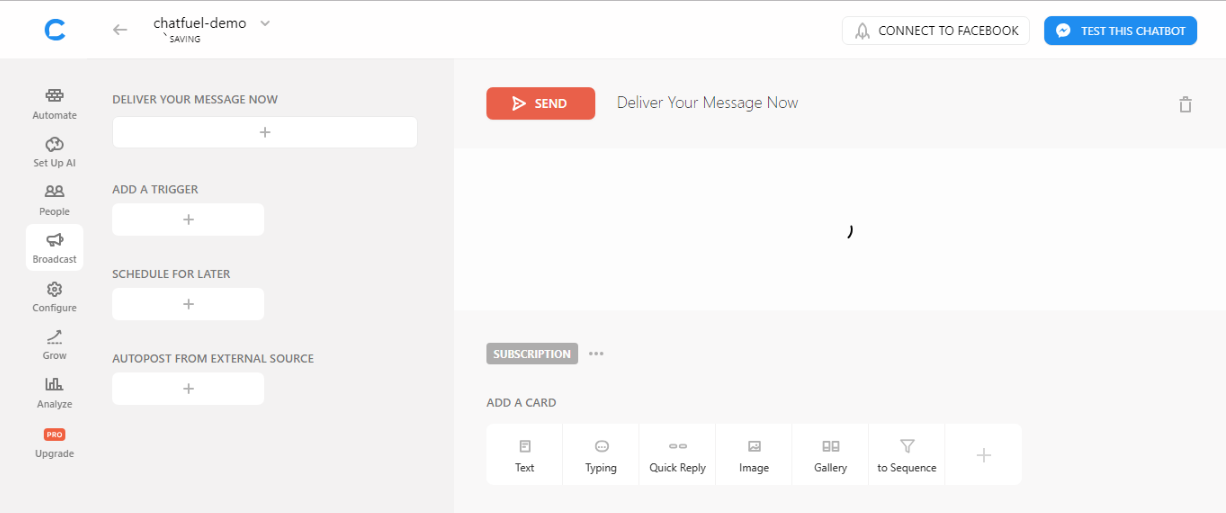
4. Broadcast
As mentioned on the dashboard “Broadcast functionality allows you to proactively reach out to your audience. Filter your users based on their attributes and send personalized messages. Start by choosing the type of broadcast you want to send on the left.”
The bot admin can deliver message now, create a trigger like ‘after first interaction’ or ‘last interaction’, schedule message to deliver later or can use RSS feed or Google Sheets. The responses are created using the same menu as we saw earlier like text, quick reply, list or gallery.
Just click on the + button on the left hand side to create a broadcast message of any type.
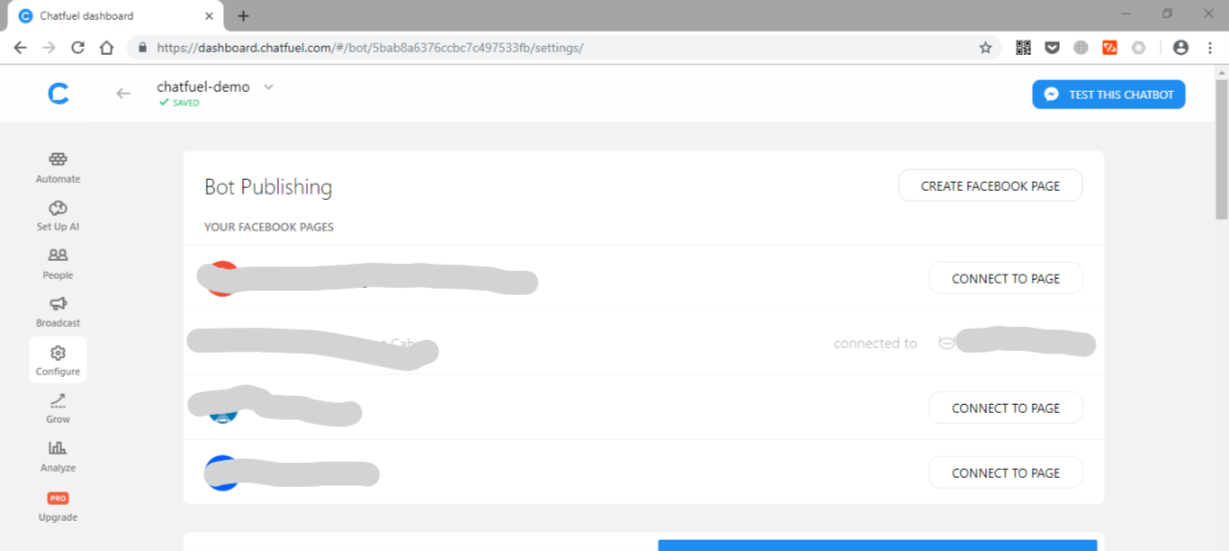
5. Configure
From the configure menu you can setup various options like Publishing Bot, Persistent menu, Multiple admins, Timezone, Chat extensions, Domain whitelisting and Payment.
The bot can be published by connecting your Facebook page with the bot. You can select the page that you want to be connected to the bot.
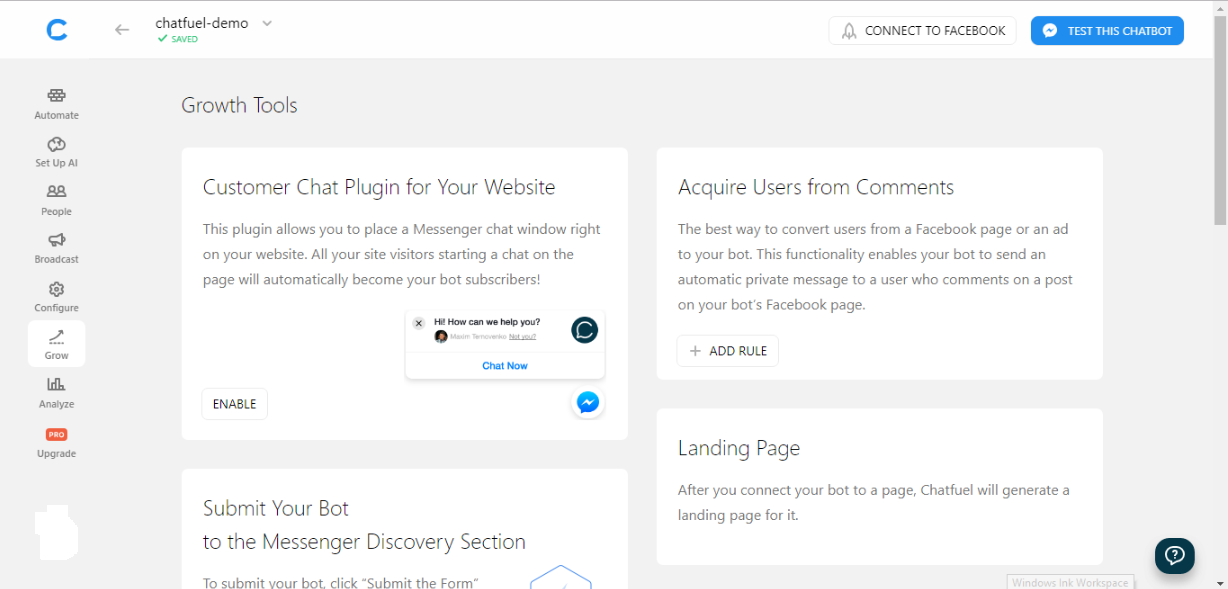
6. Growth
The growth menu provides many options to promote your bot like adding plugins to your webpage.
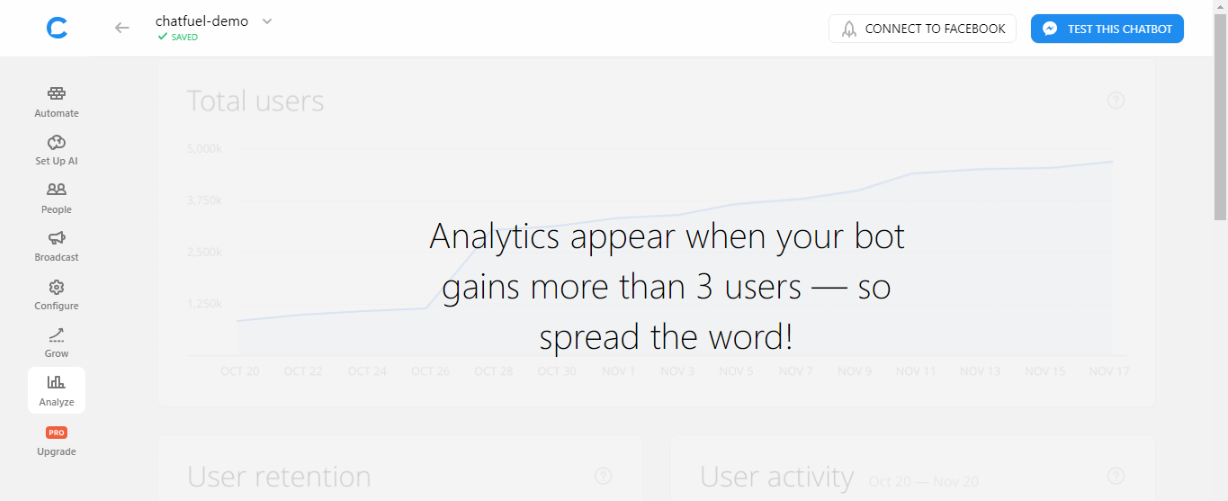
7. Analyze
The analyze menu provides the analysis of your chatbots like the number of users, bot retention, popular blocks, user activity, popular user inputs and popular buttons.
Check the necessary permissions before publishing your bot to the messenger. The bot should be able to send messages on behalf of your page.
Thank you for reading this. I hope that you find this blog helpful. Don’t wait, build your Messenger chatbot now.
Pragnakalp Techlabs: Your trusted partner in Python, AI, NLP, Generative AI, ML, and Automation. Our skilled experts have successfully delivered robust solutions to satisfied clients, driving innovation and success.